
Photo Encaustics - From Image to Art

A departure and in addition to the traditional image printing possibilities with photography, I explored, experimented and developed my first attempt at Photo Encaustic Art...
Inspired by the wonderful work of likes of Pete Kelly and Clare O'Neill, I felt that the direction of my image making using earthy tones and added textures lent itself to investigating this way of adding depth and texture to my photography.
Encaustic History.
Encaustic painting, or simply “encaustic,” is a technique that uses beeswax and damar resin as a medium to create paintings or mixed media photography. The “caustic” part of the term indicates that heat is used to melt and blend the layers of wax into a unified piece.
In ancient Greece, ship hulls were waterproofed with beeswax and tinted with brightly colored pigments. In 800 B.C., Homer writes of painted warships sailing into Troy. Hundreds of encaustic paintings exist in the form of the Fayum funerary portraits painted on wooden masks that adorned the deceased, leaving their realistic portrayal in pigmented wax. These nature-based materials from B.C. times are surprisingly consistent with those found in an encaustic workroom today.
Photo Encaustic Styles
Photographers with different creative viewpoints can experiment with photo encaustic using a range of methods:
1. Brushing a smooth coating of medium over photographic image, this application of a translucent wax surface gives interest, texture and depth.
2. Altering the photo by applying textures ranging from scratches and aging effects to heavy sculptural forms. Adding multiple layers of wax on sections of the image gives dimension and character. Colour, too, can be applied, using crayons and remade encaustic infused wax, personalising the work even further.
3. Using the translucent effect of the wax, allowing light to pass through an image or combining several images together. A variety of objects like old letters, textiles and other interesting ephemera can also be layered into a piece. The process is very rewarding and the medium allows for infinite changes and manipulation of the materials until you (or your client) are satisfied.
The Proof of the Pudding...
As I am more a photographer than writer, I am going to give you a photo-tour of the building of the first commission I was given for an Encaustic piece.
I do not profess to be an expert by any stretch of the imagination, and realise that I still have a great deal to learn about this style from the masters... but I thought the steps and the results may well interest readers as much a s I enjoyed the journey and the process.
'Any colour you want'...
The beauty of photography is the ability to alter the image to what is aesthetically pleasing... not only for me, but for the customer.
My first commission for Encaustic art found me discussing the merits of textures, image ratios, canvas sizes and most importantly colour... The image below is the final image chosen, converted from a colour 2:3 ratio colour image, to a textured, sepia and panorama ratio image developed in the sitting room where the piece would hang... with the careful use of a digital projector and photoshop, and a laptop, the image chosen from my archives was born and projected in place as a rough idea of how the final installation would look.
The final image prior to encaustic work.
Encaustic Art Panel building.
Making the Braced Panel...
After much research and development, (reading and internet scanning) and email contact with guys who had done this , I soon discovered that most had started with modest 8 or 12inch square panels, and having made several 16 and 20 inch panels previously... I thought nothing of taking on this piece art 5 x 2 ft.... easy I thought!!
Left is a picture of the building of the panel in my garage, using regular redwood pine and beech ply... (now sourcing tulipwood and aircraft ply) ensuring all materials used are archival,enviromentally sustainable and reasonably light!... my first mistake... art panels made of this material and this size, are not light!!
Below is the glued and set panel with the first coat of archival Gesso paint applied to ensure constant, smooth and regular background (all material should, ideally, be permeable to allow fusing of the medium from layer to layer) once dry, the piece is then filled, sanded and prepared for the print.
Panel finished with Gesso coating.
Lining up the image for application.
The Print
The print is then applied to the image (different ways of doing this prevail, from gluing the image traditionally to bonding with glue tape, there seems to be no wrong or right way, but must remain stuck, archival and smooth. The paper is traditionally Giclee textured or smooth archival printed using an Inkjet printer. My preference is for an archival textured porous paper which is easy to handle from a positioning and smoothing point of view. The print should be applied to the panel in a dust and particle free environment (my kitchen unit in this case)
Piece with Ebony Stain applied...
The Ebony Stain
Once dry, I used small sander to soften the edges of the image in preparation for application of an ebony stain to the panel edges. the application of the ebony stain is a preference due to the nature of the wood, and , for me, provides a rustic and finished appearance to the piece. If you were using nicely grained or hardwood, perhaps a masking tape or clear stain may be more appropriate. I have also used black matt paint which works equally well in this situation.
The First Waxing.
With the panel at an angle it is important on such a large piece to work fast and the wax is liberally applied using a large sable brush.once dry it is then heated and bonded to the panel using a combination of heat gun, iron and re applying wax where needed... it is manipulated around the panel using brushes, spatulas and scrapers to create the textured effect and heated to bond it to the surface, this is repeated to build depth if needed or reheated to either move or lessen the texture, thickness or effect. The beauty of this process is that if you, or the customer, is unhappy with any aspect of the texture work, it is easily changed, thus ensuring the piece is to the liking of both and involving the customer in the artistic process making it more personal.
The panel ready for the waxing process, note the heat gun and brushes.
Preparing the beeswax and Damar resin for application on the hotplate.
The aftermath of the first waxing...

Wax detail worked with the heat gun and brushes.
Final piece
The Finishing Line...
Once finished and happy with the effect, I left the piece for a couple of days to set and gently buffed the surface to enhance the sheen from the wax.
The piece was then shipped off to my framer to finish the job off, with the customer requesting a floating frame to mirror the clean lines of the eventual position, rather than the rustic wax edged finish of the original work. However, using a 'floating frame' ensures the process and rustic effect is still obvious within the confines of a clean outer frame.
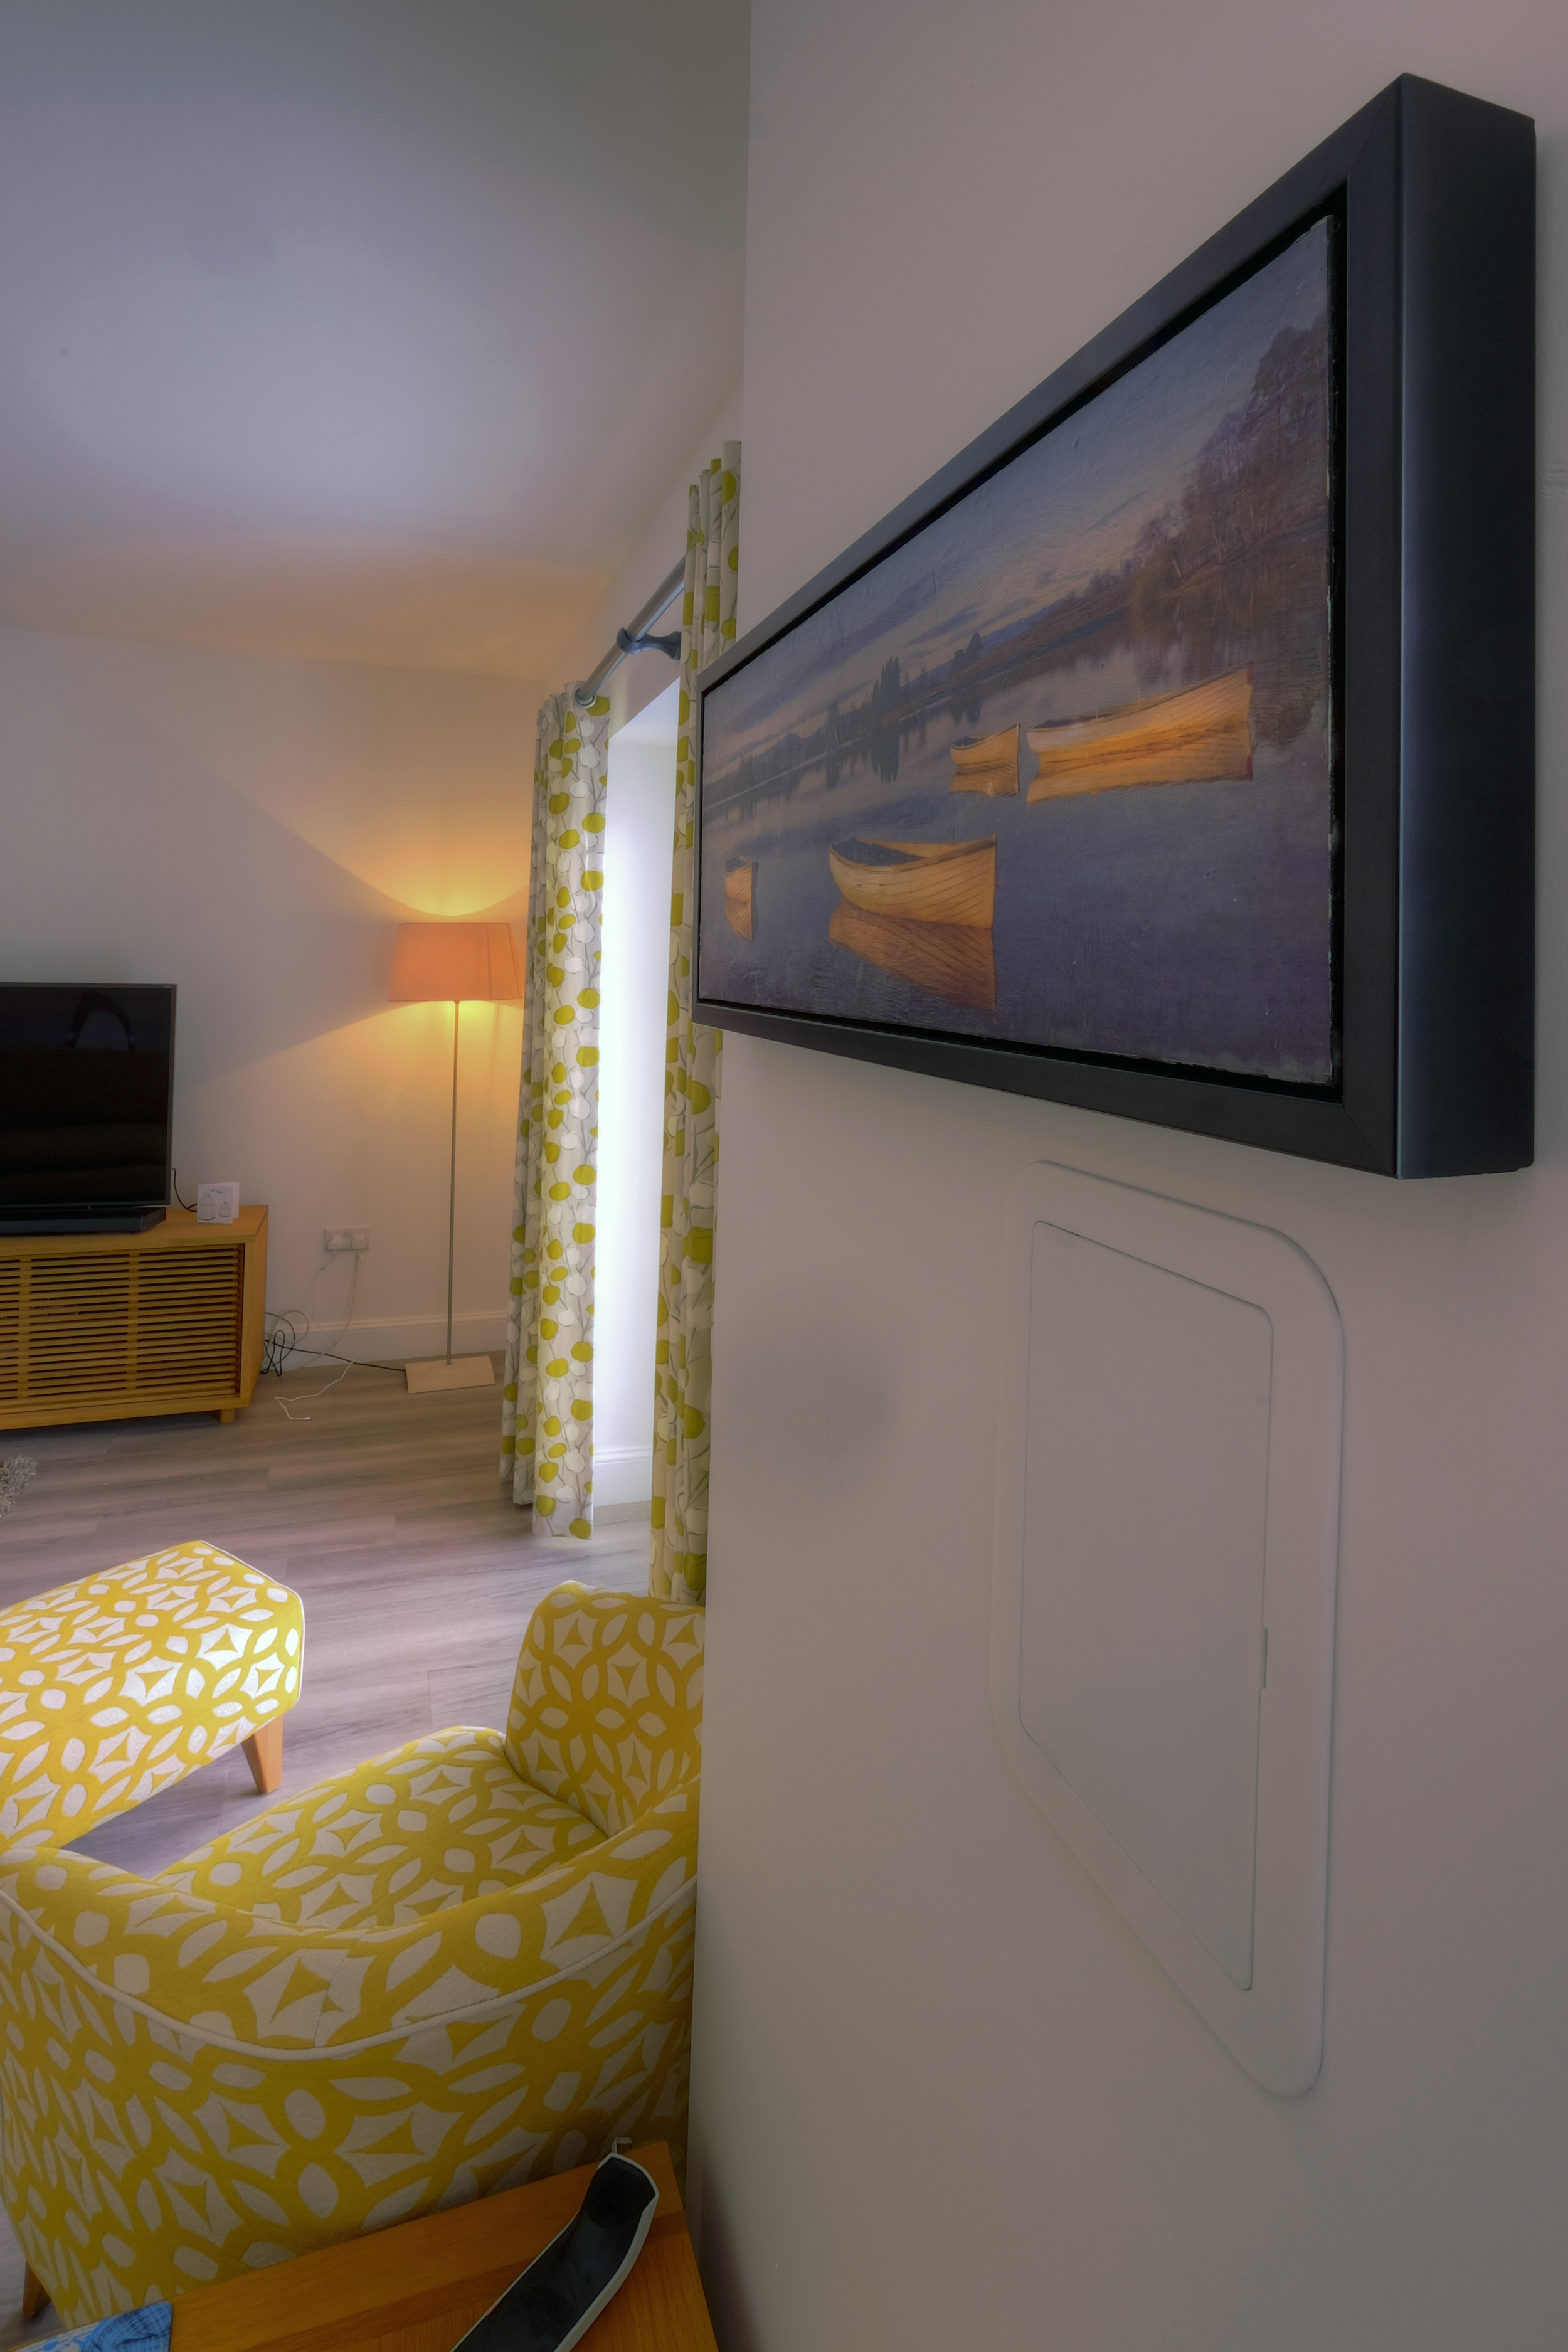
Below is the final destination for the piece, and I am delighted with the results, having left instructions on burnishing the piece for a few months to ensure it stays bright until the wax and resin eventually settle, the piece, with its very natural, tactile and involving aesthetic, ensures a 'one off' bespoke and unique piece of art.
Final position following the framing with a 'floating frame'
Some I made earlier...
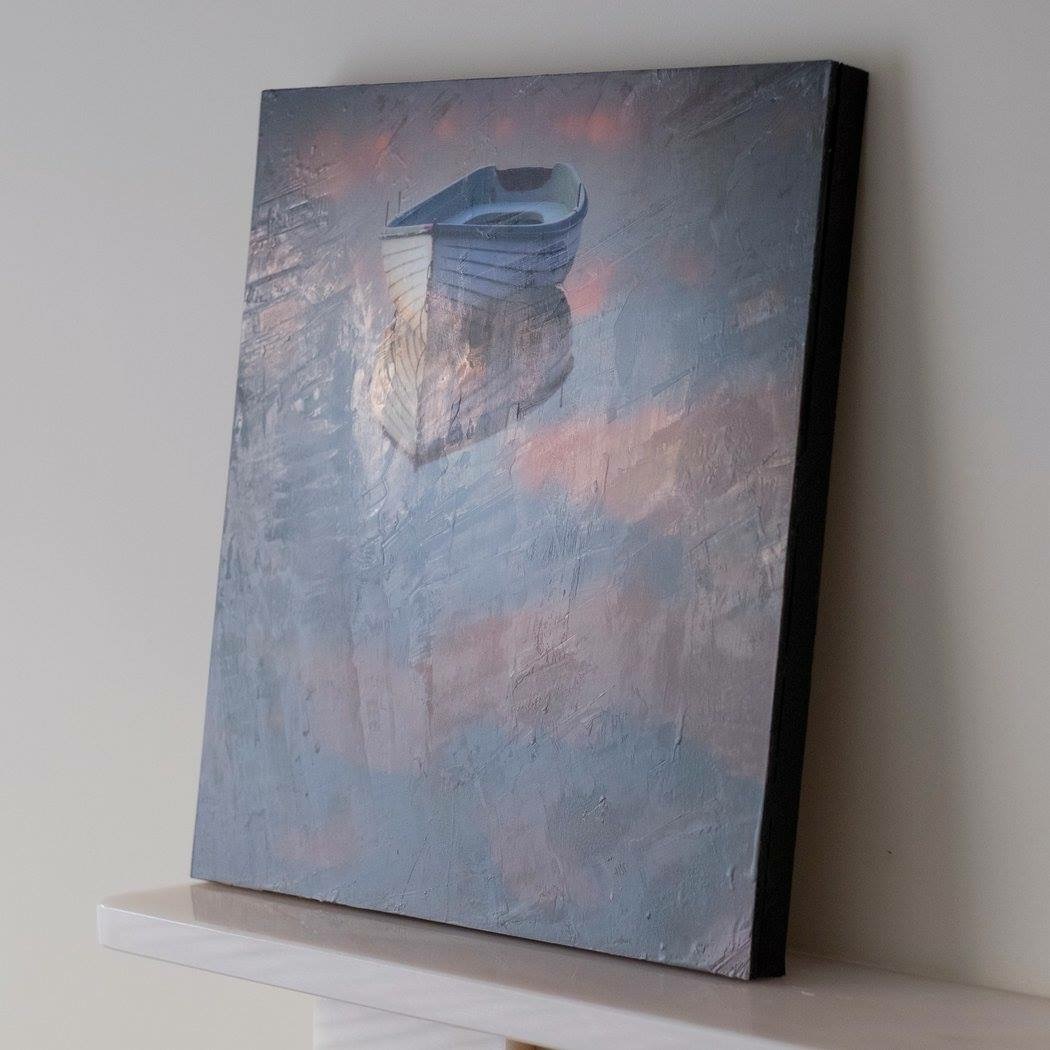
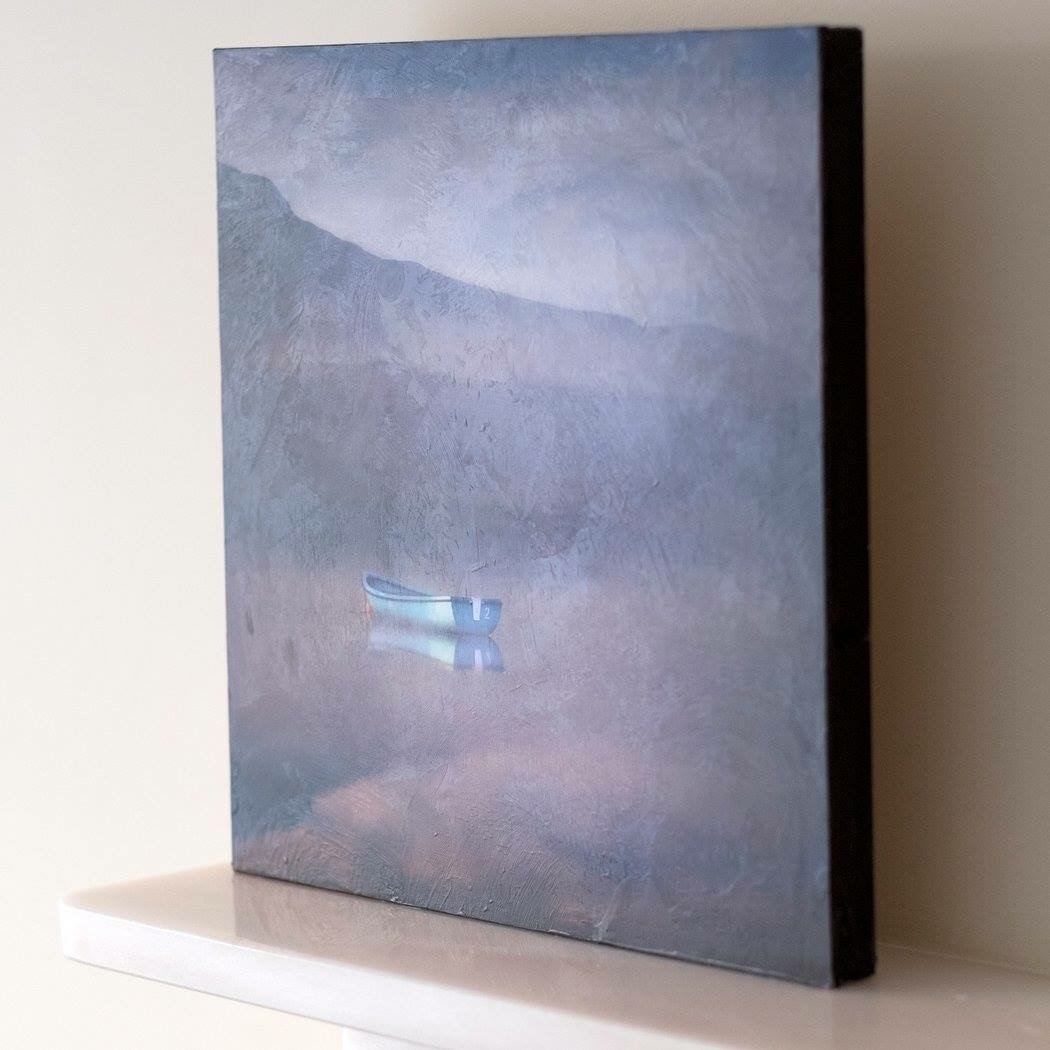
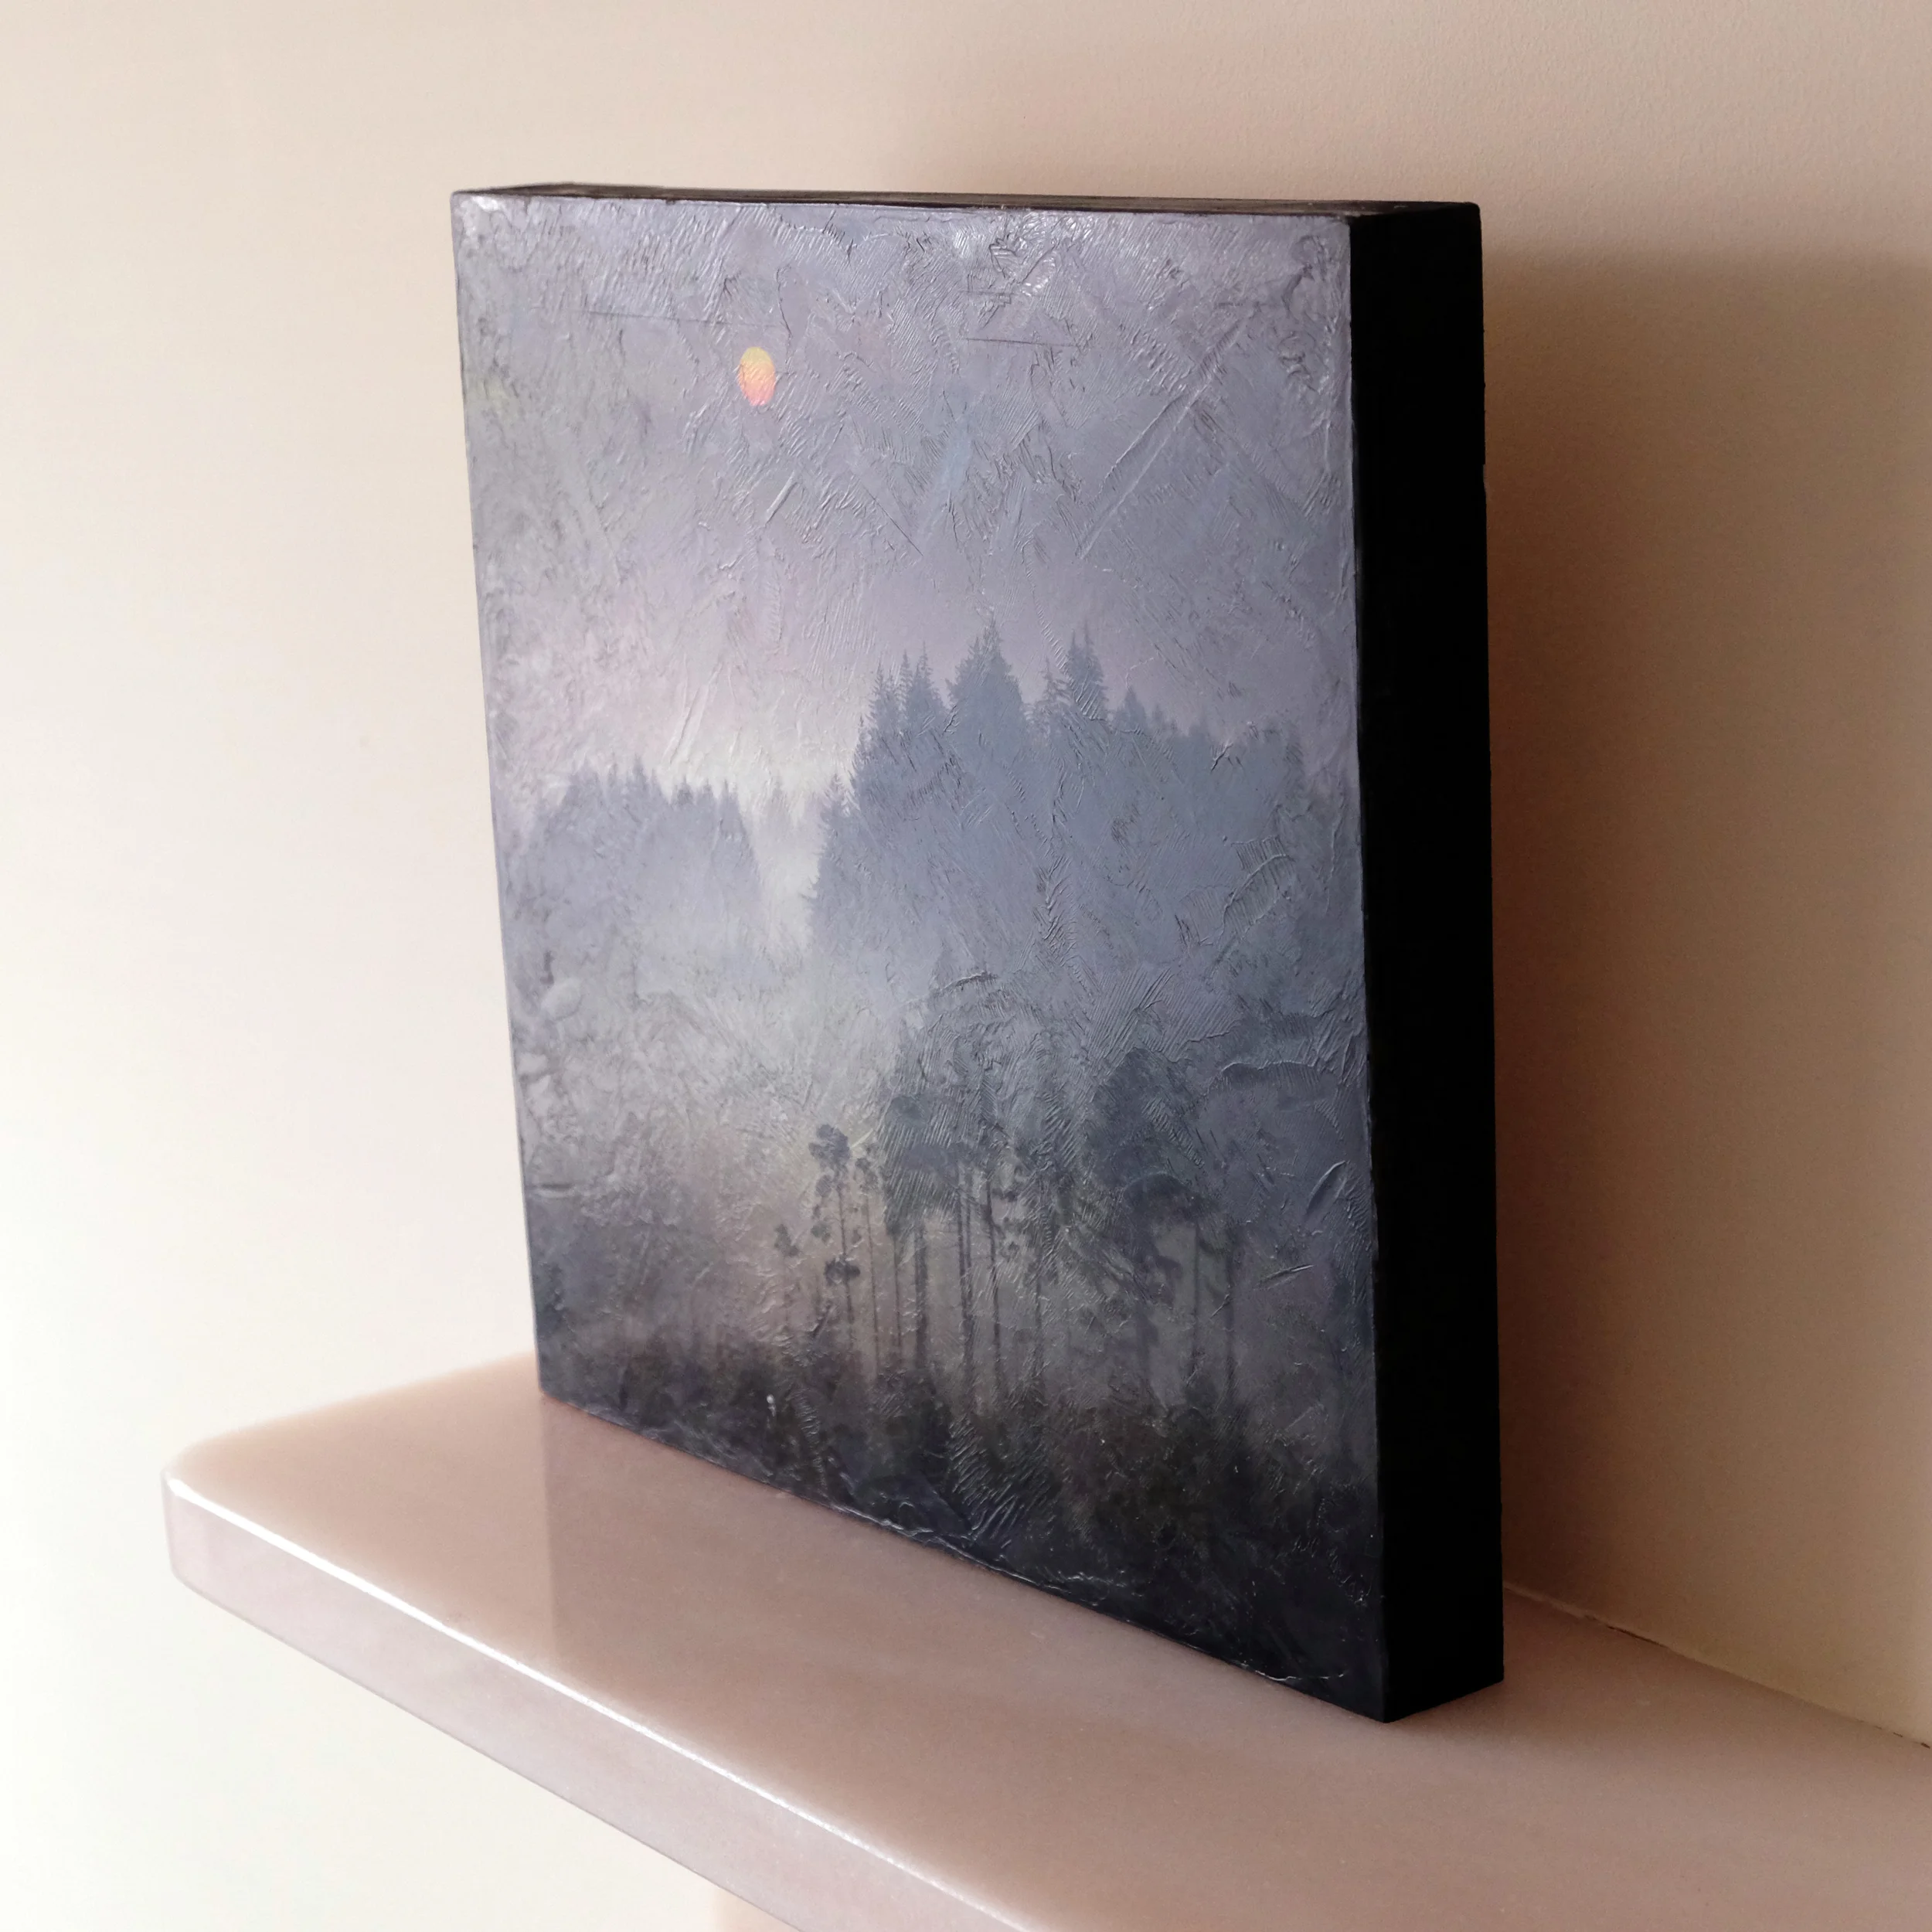
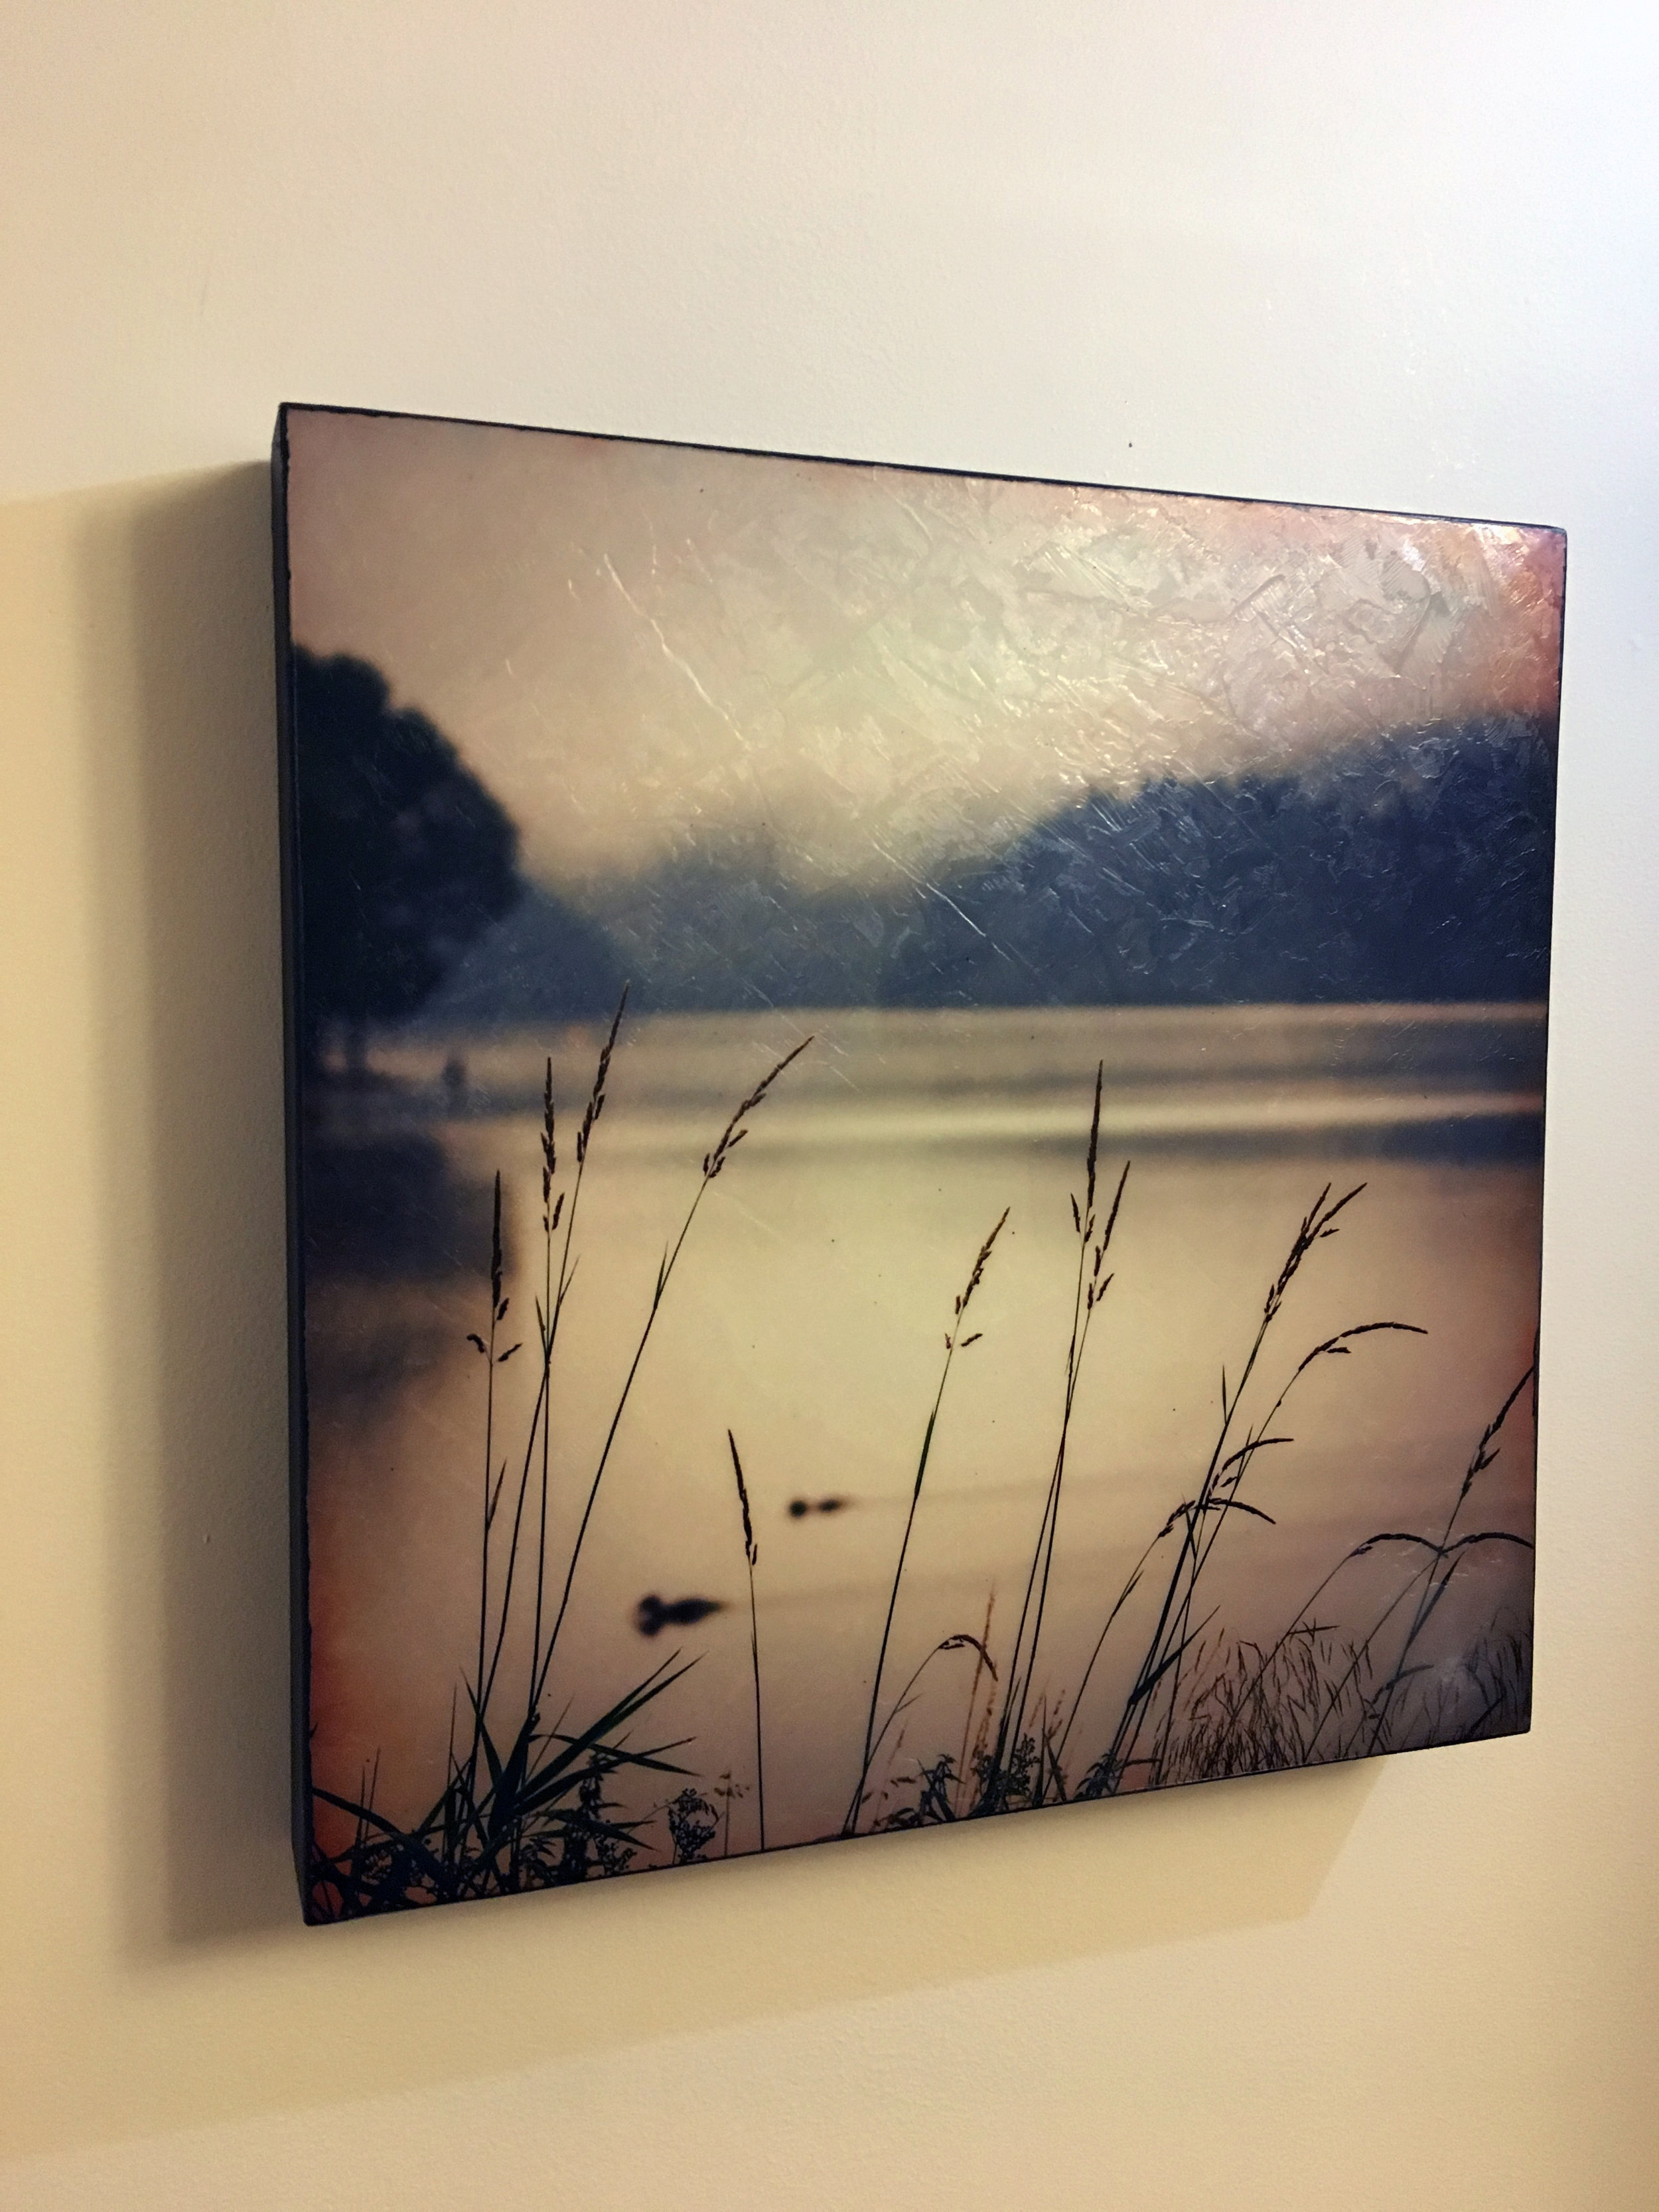
Below is a smaller project for three 16 x 16 inch pieces for my bedroom, along with some of the other pieces (16-20 inch square) that I had done in preparation and as learning pieces for the bigger work... along with some smaller commercial 12x12 inch works. I have put in two images of each work so that you can appreciate the unique textured effect on each piece.
I am delighted to report that, having been part of the process from deciding the image, a colour tone and size, nd an additional one (below) my friend seems delighted with the result, as am I...
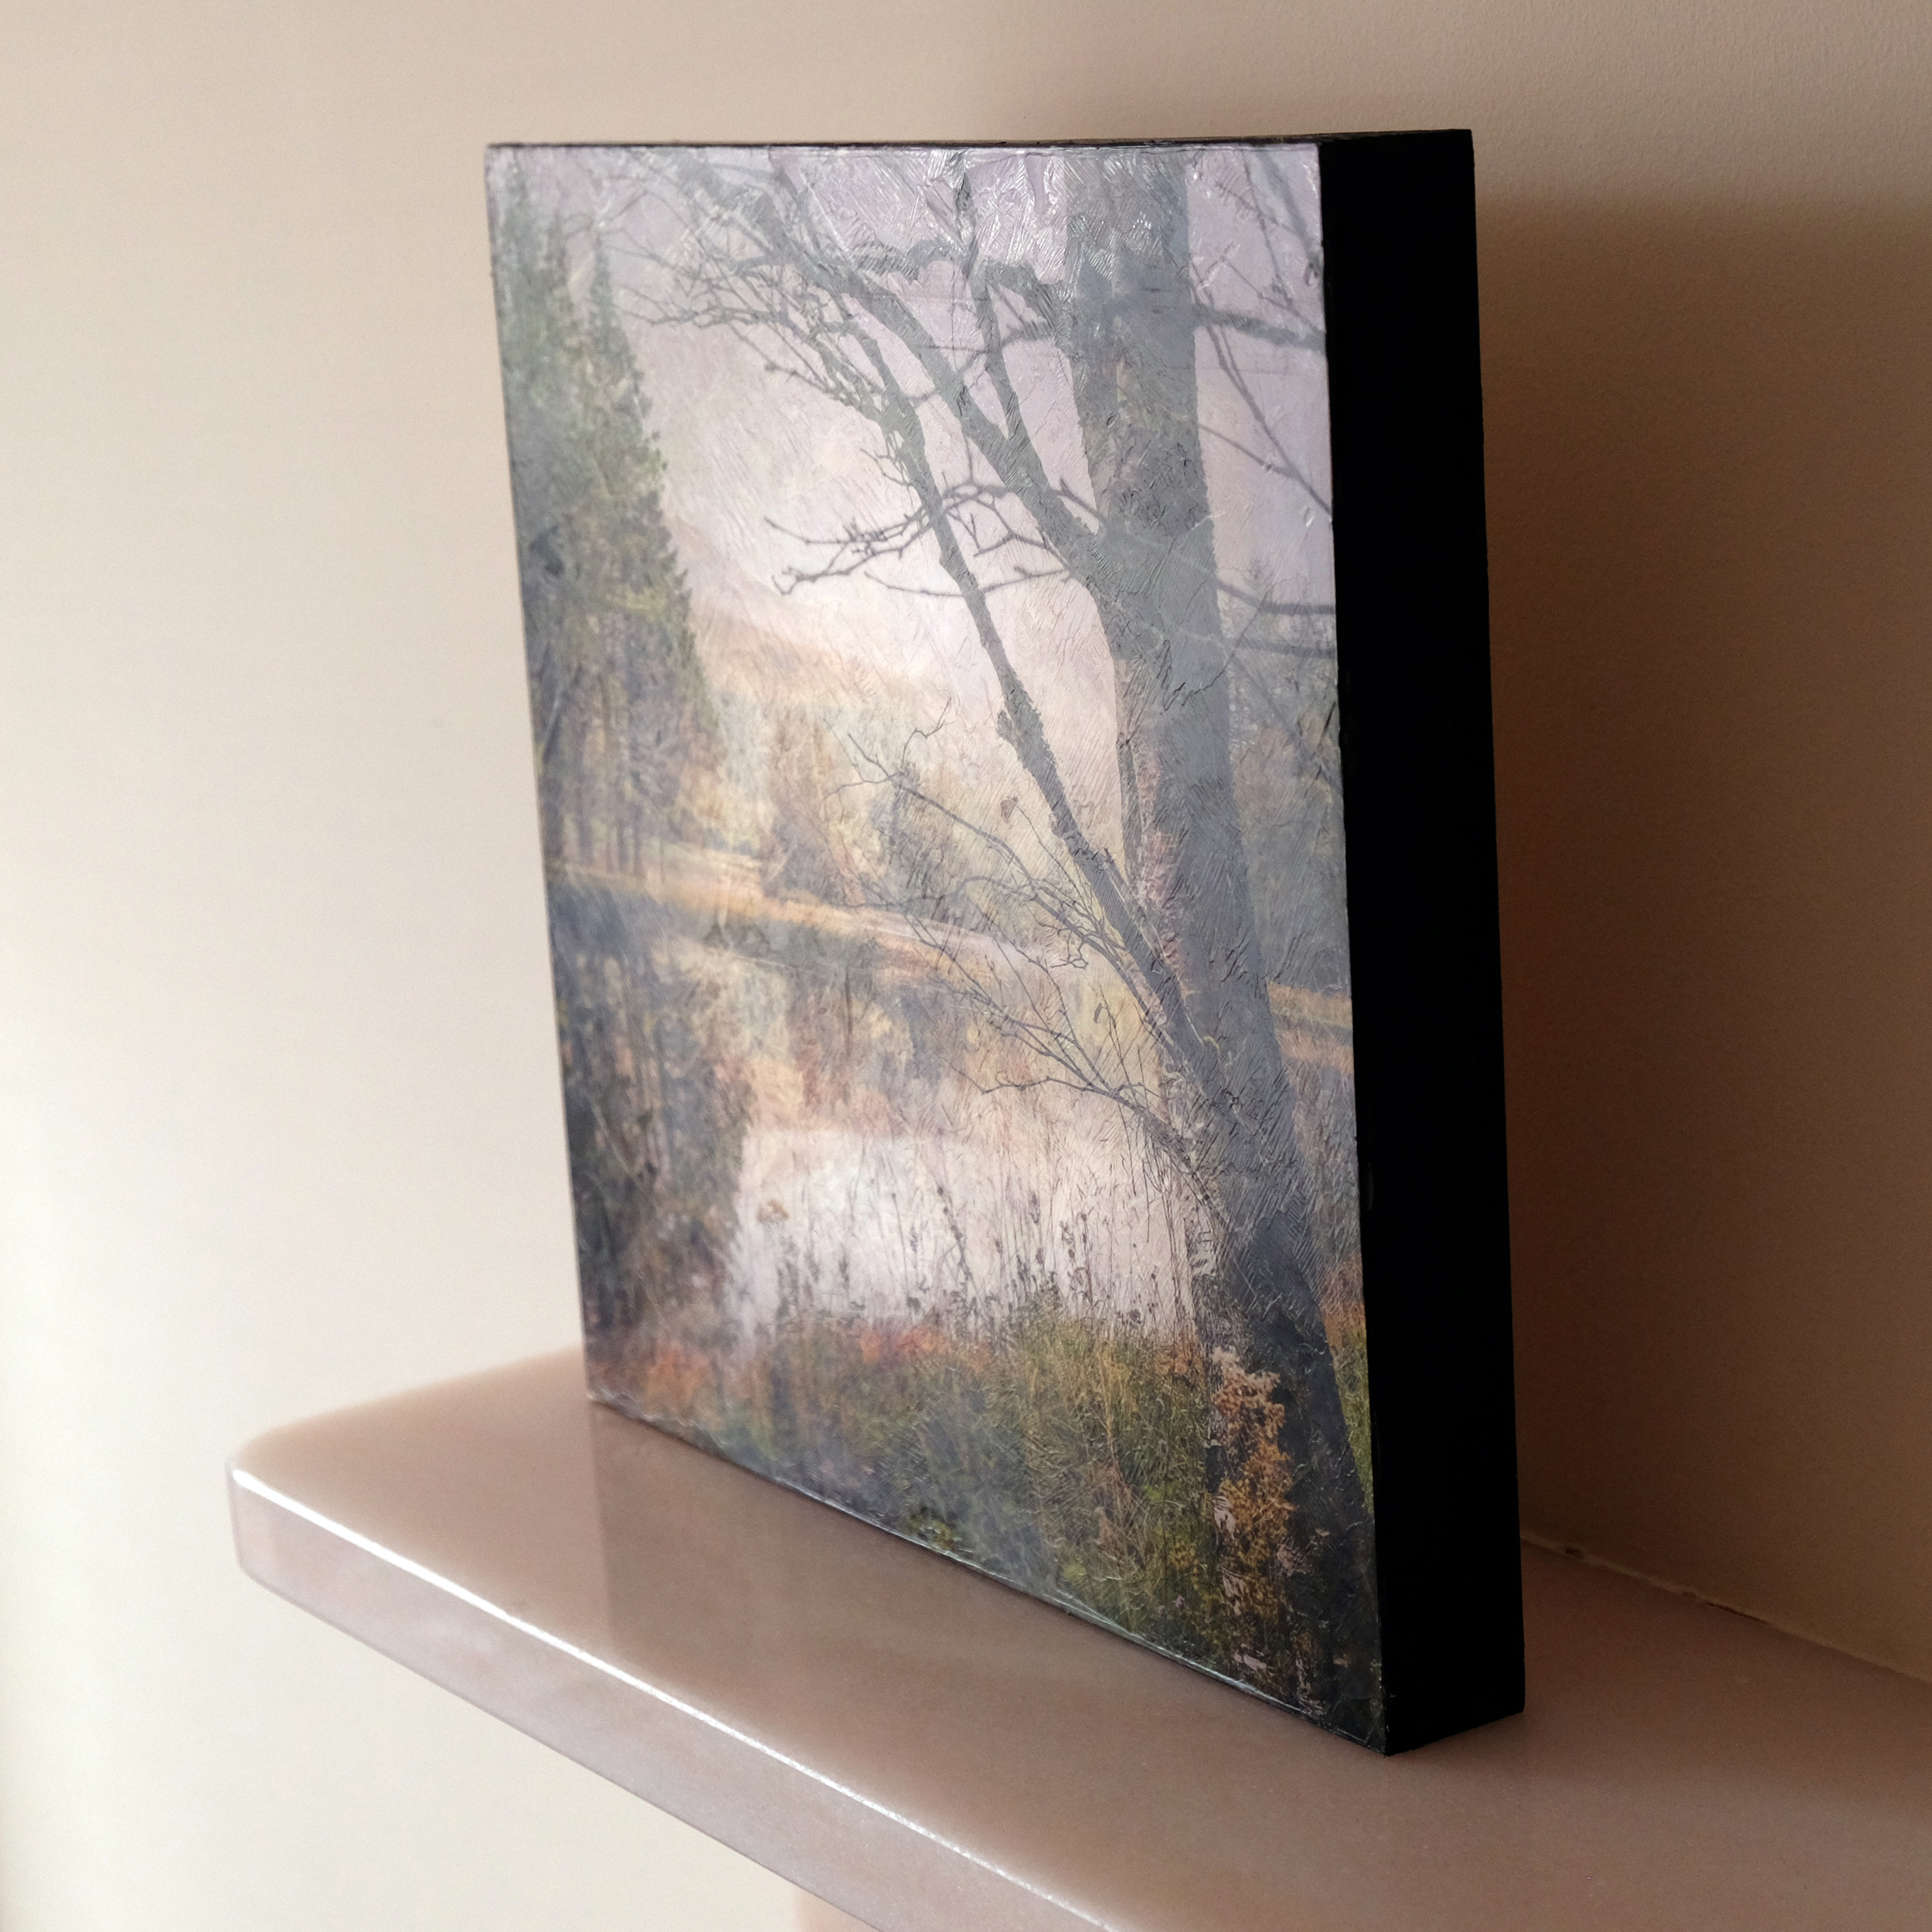
A smaller piece for the opposite wall...


Thanks you for your interest, and, needless to say, if you have any comments, queries or suggestions, drop me a line, I would love to hear from you...
David